
Upgrading your 10th generation Honda Civic lighting system is the most effective way to modernize your vehicle’s aesthetics while drastically improving nighttime visibility. Factory halogen units are outdated, dim, and compromise safety on dark roads. This guide provides the technical blueprint for a seamless conversion.
The Halogen Problem: Why Your 10th Gen Civic Needs an LED Upgrade
The 2016–2021 Honda Civic (LX, EX, and Sport trims) arrived from the factory equipped with halogen bulbs. While functional for basic driving, these bulbs suffer from a yellowish hue and a narrow beam pattern that fails to illuminate peripheral road hazards effectively.
Switching to premium LED technology changes the driving experience immediately. LEDs provide a crisp 6000K daylight color temperature, which drastically reduces eye fatigue during long night drives.
Furthermore, these trims often serve as daily drivers. Replacing your aging halogens with high-output LEDs increases your reaction time by revealing road signs and obstacles hundreds of feet earlier than stock yellow halogens. It is the single most functional modification you can perform on your Civic.
10th Gen Civic LED Bulb Size Matrix
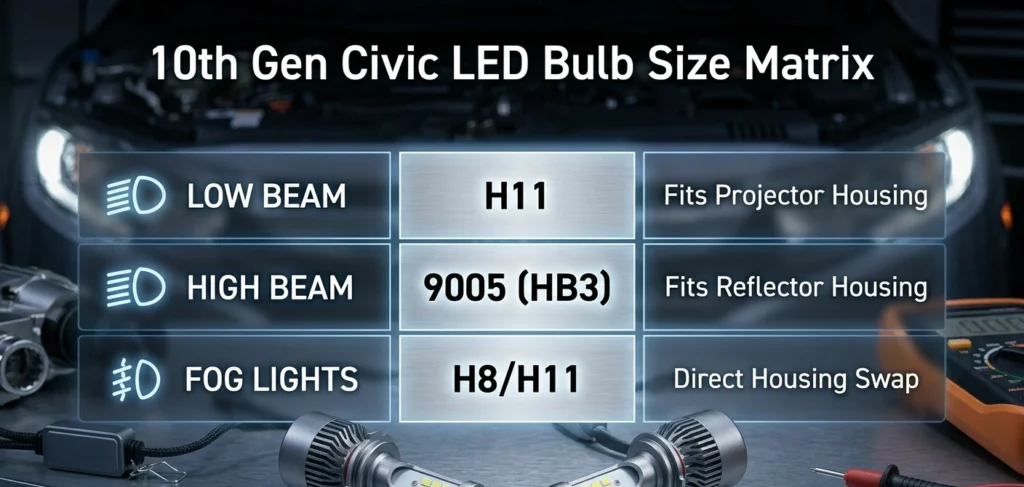
Selecting the correct bulb size is critical for a plug-and-play installation. Use this matrix to ensure you purchase the correct components for your specific housing.
| Function | Bulb Size | Application Note |
| Low Beam | H11 | Fits Projector Housing |
| High Beam | 9005 (HB3) | Fits Reflector Housing |
| Fog Lights | H8/H11 | Direct Housing Swap |
Projector vs. Reflector: Why LED Chip Alignment Matters for the Civic
Performance isn’t just about brightness. Your 10th Gen Civic’s projector housing relies on precise light placement to create a clean, sharp cutoff line.
If your LED bulb chips are not perfectly clocked at the 3 and 9 o’clock positions, the beam pattern will scatter. This results in dark spots on the road and significant glare for oncoming traffic.
Many budget bulbs fail because they lock into place at incorrect angles. Always verify that your chosen LED bulb features an adjustable collar. This allows you to physically rotate the bulb base until the diodes are perfectly lateral, mimicking the filament position of the original halogen bulb.
The Daytime Running Light (DRL) & High Beam Flicker Trap
The 10th Gen Civic uses the high beam bulb to function as both a high beam and a Daytime Running Light (DRL). It achieves this by running the bulb at a lower voltage during the day.
Standard LED bulbs are not designed for this variable voltage. When the vehicle attempts to send the lower “DRL” voltage to an LED, the bulb’s internal driver struggles to maintain steady power, resulting in a distracting strobe flicker.
To bypass this, you must use modern LED bulbs equipped with advanced constant-current drivers. These drivers are specifically engineered to handle the low-voltage pulses of the Civic’s DRL system, ensuring stable operation without flickering or “bulb out” dashboard warnings.
DIY LED Conversion Installation Guide
Upgrading your lighting is a manageable weekend project. Follow these steps for a professional result.
1. Preparation and Clearance
Accessing the driver-side bulb can be tight due to the engine airbox. You may need to shift the air intake duct or remove the airbox lid to gain necessary clearance. Never force the plastic housing clips.
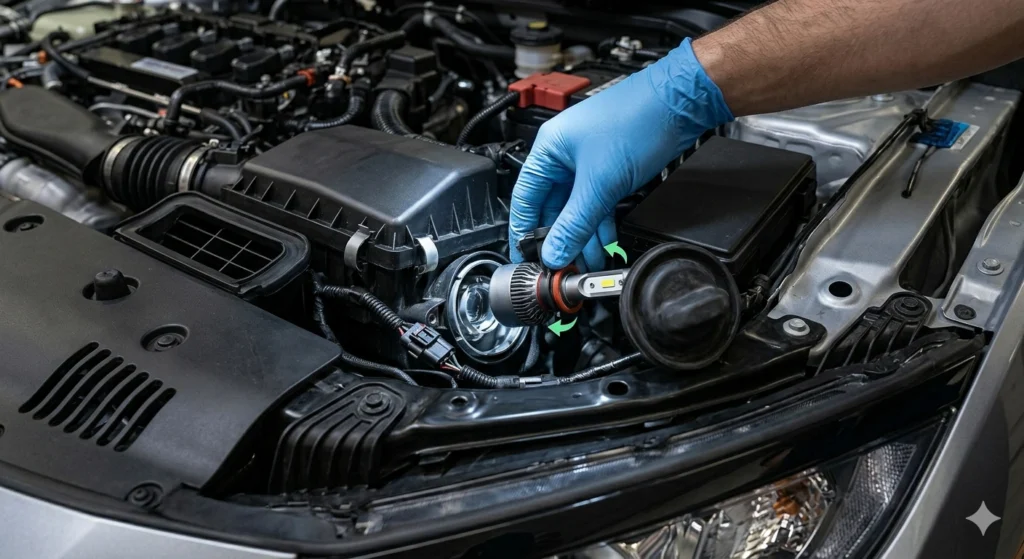
2. Removal and Swap
Twist the factory bulb counter-clockwise to unlock it from the socket. Carefully disconnect the electrical harness. Plug your new LED bulb into the factory harness and test for function before inserting it into the headlight housing.
3. Securing the Bulb
Insert the LED bulb into the housing and lock it in by turning clockwise. Ensure the chips are oriented at the 3 and 9 o’clock positions.
4. Dust Cap Management
The factory rubber dust cap must seal perfectly against the back of the headlight housing. If your LED bulb has a large rear cooling fan, it may press against the cap. Ensure the seal is airtight to prevent condensation or water damage to your headlight electronics.
5. Alignment Verification
Park your vehicle 25 feet away from a flat wall on level ground. Turn on your low beams. You should see a sharp, horizontal line with a slight “step” upward on the right side. If you see scattered light or hot spots, re-adjust the collar angle.
Troubleshooting
- No Light Output: Flip the polarity of the plug. LED connectors are sometimes reversible; if it doesn’t turn on, rotate the connector 180 degrees.
- Condensation: If moisture appears inside the lens, check the rubber dust cap seal. Ensure the fan shroud isn’t pinching the rubber.
- Flickering: Confirm your bulbs are “DRL compatible” or “Canbus ready.” If you are still