
Tools & Step-by-Step Instructions
Tackling your Honda Civic interior is one of the most rewarding DIY projects you can do in your garage. Whether you are upgrading your factory sound system, running wires for ambient LED lighting, tracking down an annoying door rattle, or wrapping your dash in a fresh vinyl finish, getting behind those factory panels safely is step number one.
Too many car owners dive headfirst into the job with whatever is lying around the toolbox. That shortcut usually ends up costing you: scratched plastic, snapped retaining clips, broken dash tabs, and a pricey trip to the dealership for replacement parts.
Using the right tools and following a proper sequence saves you money, time, and a whole lot of garage frustration. This guide breaks down the exact tools you need, generation-specific quirks to watch out for, and a fool proof walkthrough for removing your Civic interior trim safely.
Essential Interior Trim Removal Tools for Your Honda Civic
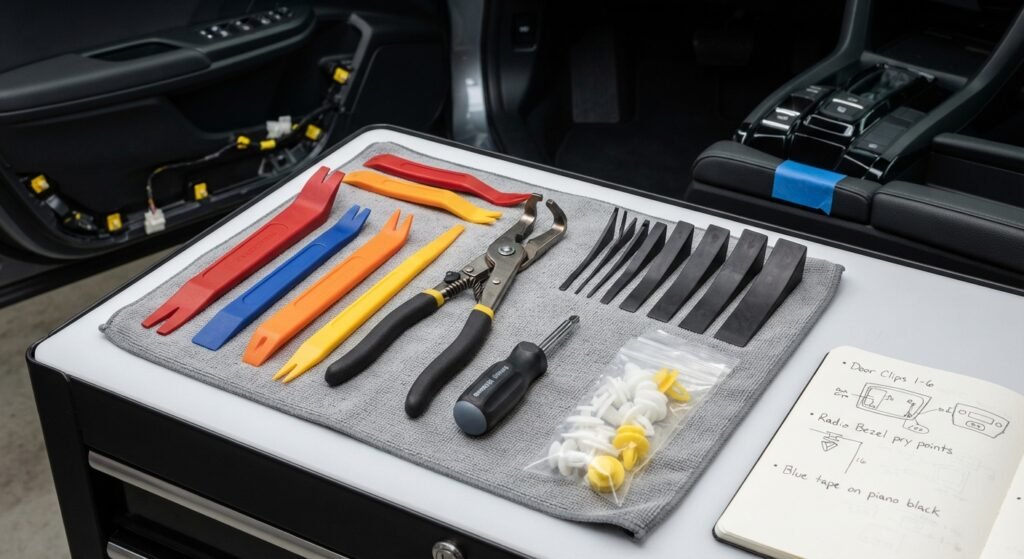
First things first: never use metal flathead screwdrivers or kitchen butter knives. Factory plastics scratch instantly, and metal will gouge soft-touch dashboard materials beyond repair.
- Nylon Plastic Pry Tools:
A set of reinforced nylon pry bars is your best friend here. Nylon is sturdy enough to give you real leverage, but soft enough to yield before it damages painted or textured surfaces. Look for a kit that includes a mix of wedge shapes, flat tips, and pointed ends. - Upholstery Clip Pliers:
Standard pliers usually crush plastic push pins, making it impossible to pull them straight out without snapping the surrounding anchors. Clip pliers feature a specialized angled head designed to spread pressure evenly beneath the push-pin head, letting you pop stubborn clips out cleanly so you can reuse them. - Magnetic Stubby Phillips Screwdriver:
Honda loves hiding screws in tight spots, like behind door handles and deep inside center console compartments. A magnetic stubby screwdriver gives you the reach and leverage you need without stripping small fastener heads or scraping your knuckles. - Trim Removal Wedge Set:
Wedges with varying taper angles let you slide smoothly between tight panel gaps. Start with a thin wedge to crack open the initial separation, then swap to a thicker pry bar for the final release.
Generation-Specific Insights for Honda Civics
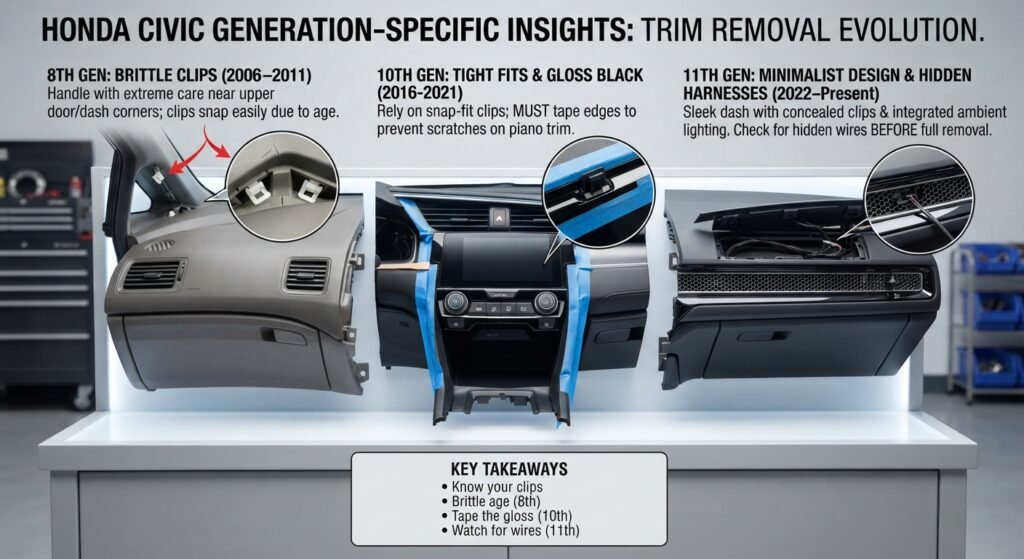
Every generation of the Civic features a slightly different clip layout and plastic compound. Knowing what you’re working with prevents unnecessary breakages.
- 8th Generation (2006–2011):
These models use older-style plastic clips that tend to get brittle over time due to sun exposure. Be extra careful around the upper door frames and dash corners where the plastic snaps easily. - 10th Generation (2016–2021):
These interiors rely heavily on tight-fitting snap-fit clips alongside gloss-black piano plastic accents. Always lay down blue painter’s tape around your work edges to prevent unsightly scratches on that glossy center console. - 11th Generation (2022–Present):
The latest Civics feature sleek, minimalist dashboards with hidden clips and integrated ambient lighting strips. Always check for concealed wire harnesses behind the dash trim before pulling any piece completely free.
Step-by-Step Guide: Removing Honda Civic Door Trim Panels
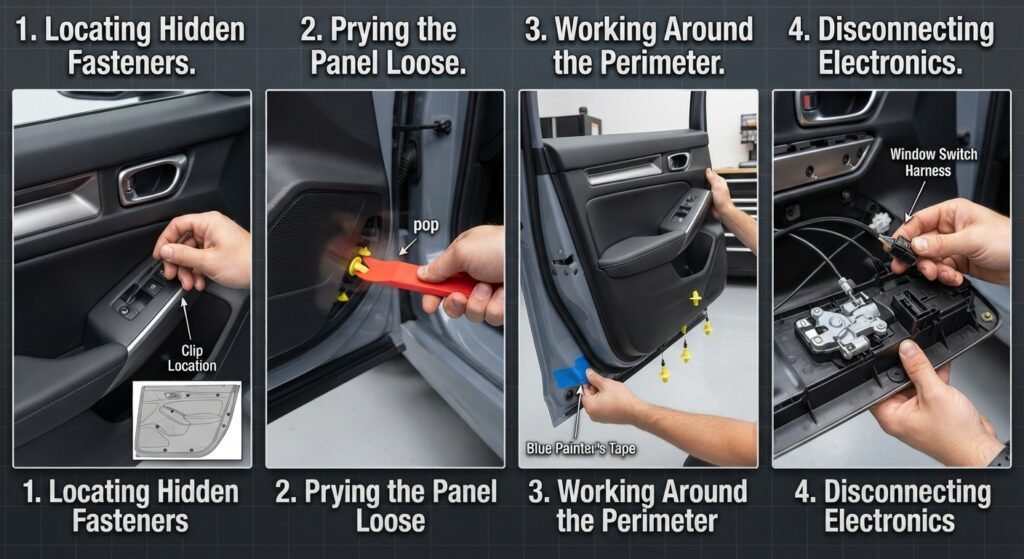
Door panels across most Civic generations are held together by a mix of hidden screws and plastic push pins. Take your time here to keep those tabs intact.
1. Locating Hidden Fasteners
Inspect your door card thoroughly. Look inside the recessed door handle pocket and behind the armrest pull cup. You’ll usually find small plastic covers hiding Phillips screws or bolts. Pop these covers off gently with a pick tool and remove the fasteners completely.
2. Prying the Door Card Loose
Insert your flat nylon wedge tool at the lower corner of the door panel, right between the metal door frame and the plastic card. Slide it along until you hit resistance from a plastic clip. Give the tool a firm, steady pop outward to release it.
3. Working Around the Perimeter
Work your way around the bottom and sides of the door card, popping each clip loose one by one. Once all the lower and side clips are free, do not pull the door card away completely yet there are still wires connected behind it.
4. Disconnecting Electronics and Cables
Lift the door card slightly upward to clear the inner window sill channel. Look behind the panel to unplug the power window switch harness and unhook the mechanical door lock and handle cables. Set the door panel safely aside on a soft blanket to keep it scratch-free.
Removing Dashboard and Center Console Trim Panels
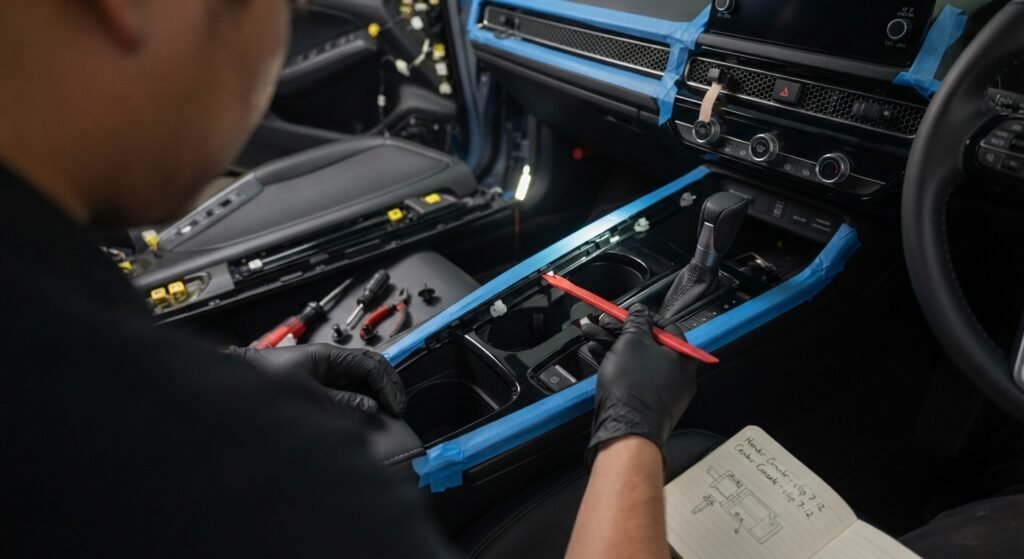
Working on the dashboard requires extreme patience. These components are highly visible, and replacements can be surprisingly expensive if you crack one.
Radio Bezels and Climate Control Surrounds
Most center dash trims on modern Civics use hidden spring clips instead of visible screws. Start from the bottom edge of the trim piece using a thin nylon wedge. Apply even, steady outward pressure across the entire piece rather than yanking from just one corner, which warps or snaps the plastic frame.
Handling Gloss Black Piano Plastic
If your Civic features high-gloss black trim around the shifter and center console, treat it like glass. This material scratches if you even look at it wrong. Always lay down blue painter’s tape around the edges of the trim before sliding in your pry tools.
Pro Tips for Reinstallation & Preventing Rattles
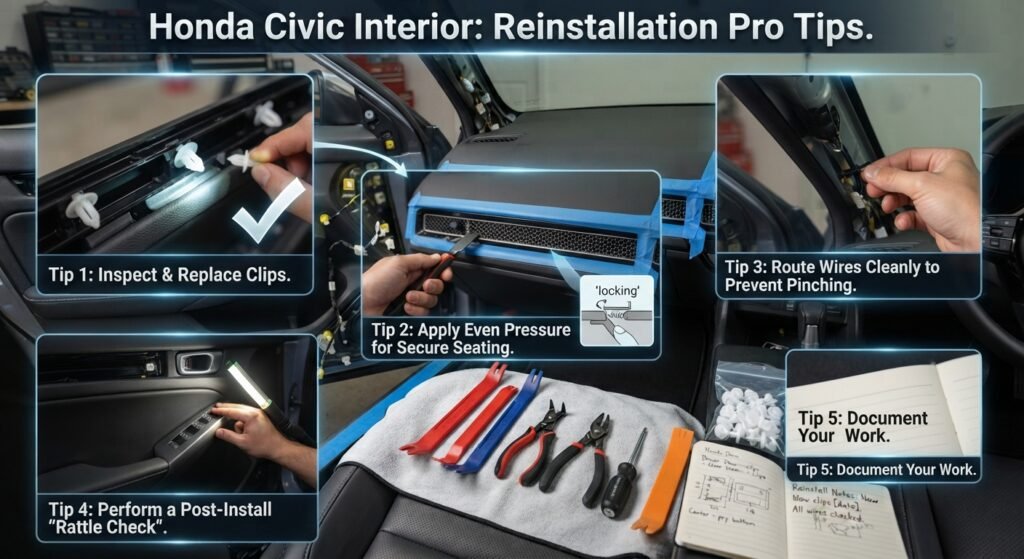
Putting everything back together correctly is just as important as taking it apart. Skipping these steps is the number one cause of annoying cabin rattles down the road.
- Inspect Retaining Clips:
Every time you pull a panel, check the yellow or white nylon clips left behind in the metal frame. Look closely for stress marks, bent prongs, or missing rubber vibration washers. - Replace Worn Clips:
Never reuse a damaged clip. Keep a bulk pack of replacement Honda interior clips on hand before you start your project. Snapping fresh clips into your door cards ensures they lock down tight against the metal frame. - Route Wire Harnesses Properly:
Before pressing your panels back into place, double-check that all electrical wires and cables are routed cleanly through their designated cutouts. If a wire gets pinched behind a clip, the panel won’t sit flush and will likely rattle constantly while driving.
Frequently Asked Questions
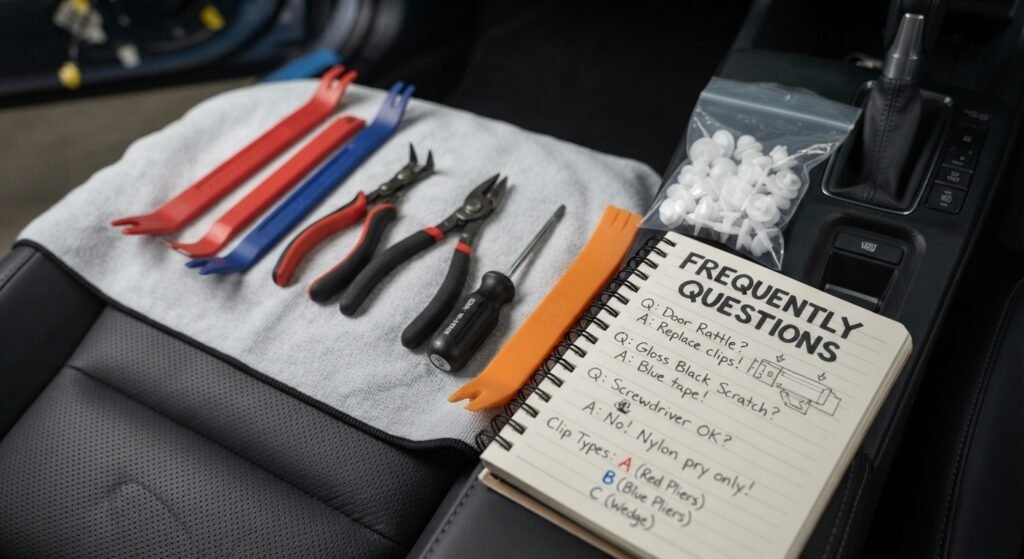
Can I use a regular flathead screwdriver instead of trim tools?
You should avoid using a standard metal screwdriver at all costs. Metal leaves permanent gouges and deep scratches on soft interior plastics. Always stick to soft nylon pry tools to protect your cabin.
Where can I buy replacement Honda Civic interior panel clips?
You can find exact-fit replacement clips on Amazon, at local auto parts stores, or directly through your local Honda dealership’s parts counter to ensure factory-grade quality.
How do I stop my door panel from rattling after putting it back on?
Rattles usually happen because one or more plastic clips broke during removal and weren’t replaced. Pop the panel back off, inspect the clips, and replace any loose or broken ones with brand-new pieces.
Are you planning to upgrade your door speakers, or are you tearing down the dash to wrap some trim? Let me know what specific project you’re tackling!