
This guide provides the technical procedure for installing the PRL Motorsports intake system on the 11th-gen 2025 Honda Civic.
Ensure the engine is completely cool before starting. Disconnect the negative battery terminal to prevent electrical shorts and trigger-happy ECU fault codes.
Phase 1: Factory Component Removal
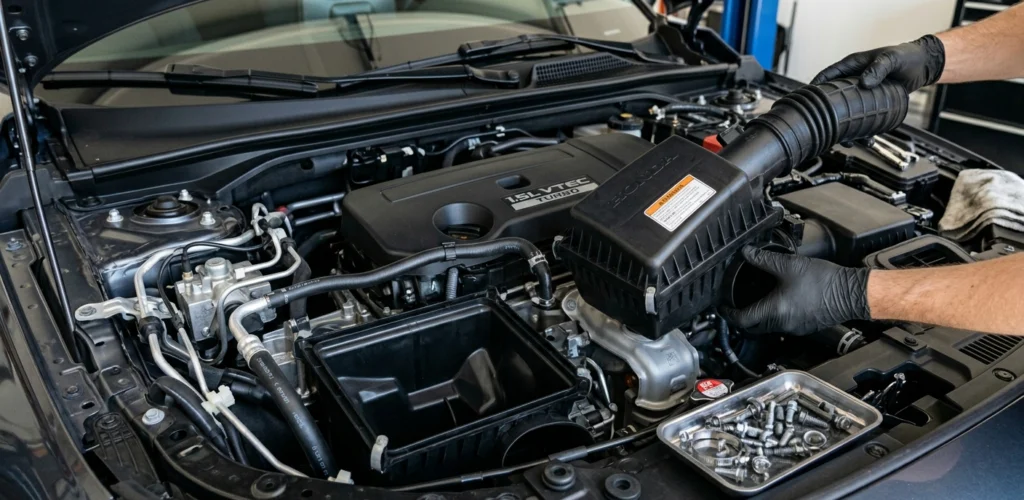
- Airbox Access: Locate the four factory hose clamps securing the stock intake tubing and airbox assembly. Loosen them using an 8mm socket or flathead screwdriver.
- Hose Disconnection: Carefully slide the intake tube off the throttle body and the turbo inlet pipe. Gently detach the vacuum lines connected to the factory intake hose.
- EVAP Housing: Locate the EVAP emissions housing mounted on the side of the factory airbox. Carefully unscrew the mounting hardware. You must preserve the EVAP housing; do not bend or kink the hard lines attached to it, as these are brittle and prone to fracture.
- Airbox Extraction: Remove the remaining bolts securing the lower airbox housing to the chassis. Lift the assembly out of the engine bay, keeping the rubber grommets for the new setup.
Phase 2: PRL Intake Assembly
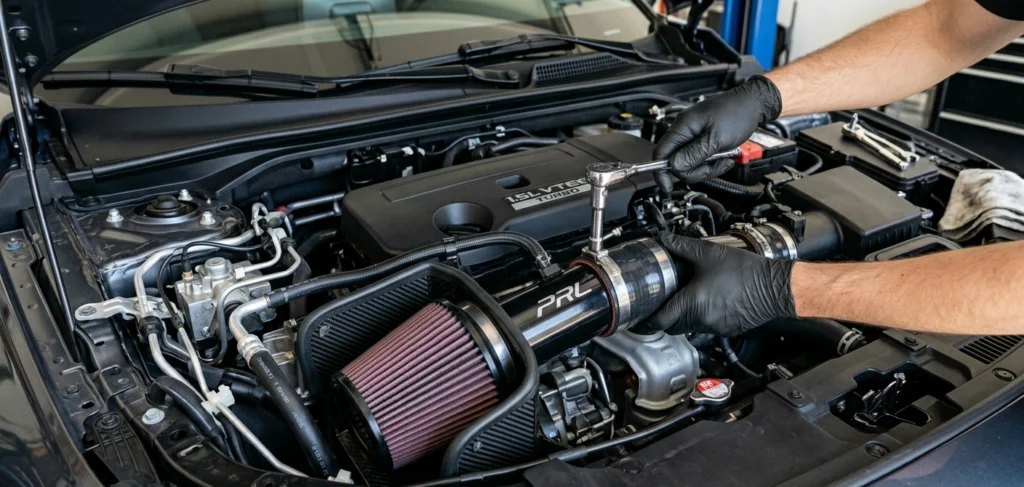
- Coupler Configuration: Install the provided 4-ply silicone couplers onto the PRL intake tube. Tighten the hose clamps to 35 inch-pounds (in-lbs). Over-tightening will warp the silicone and cause boost leaks.
- MAF Sensor Transfer: Remove the Mass Airflow (MAF) sensor from the factory intake tube using a precision screwdriver.
- Sensor Installation: Insert the MAF sensor into the PRL intake tube. Use the provided M4x6 socket screws. Tighten these to 15 inch-pounds.
- Warning: These screws are small. Do not use an impact driver. Hand-tighten only to avoid stripping the threads in the aluminum housing.
- Mounting the Heat Shield: Install the PRL heat shield into the factory mounting locations. Use the provided hardware and ensure the rubber trim is seated properly to seal the shield against the hood liner.
- Final Seating: Connect the intake assembly to the turbo inlet. Ensure all couplers are fully seated against the bead of the pipe before tightening clamps.
CRITICAL TECHNICAL TIP Before final tightening, verify that the intake tube is not touching the AC lines or the radiator shroud. Any metal-on-metal contact will cause resonance vibration throughout the cabin under load.
Phase 3: Troubleshooting Guide (Forum-Validated)
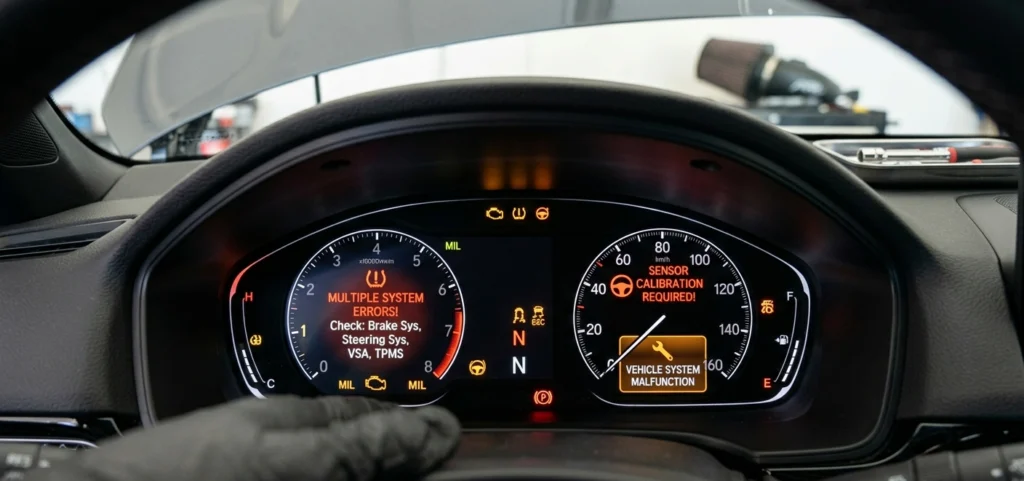
1. The “Christmas Tree” Dashboard Lights
If you disconnected the battery, the 2025 Civic will likely throw multiple driver-assist system errors (Brake System, Steering, VSA) upon startup.
- Fix: This is a standard Honda calibration event. Start the car and turn the steering wheel lock-to-lock (all the way left, then all the way right). Drive the car for 1/2 mile; the sensors will recalibrate themselves and the lights will clear.
2. MAF Sensor Fouling (Low MPG / Stuttering)
If you are using a re-oiled filter, applying too much oil will cause the oil to migrate onto the MAF sensor hot-wire. This results in inaccurate fuel trims and a significant drop in MPG.
- Fix: Remove the MAF sensor and spray it with Mass Air Flow Sensor Cleaner. Do not touch the wire. Let it air dry for 20 minutes before reinstalling. If the issue persists, the sensor may be permanently contaminated.
3. Whistling Noise at Idle or Load
A persistent high-pitched whistle usually indicates an unseated vacuum coupler or a loose clamp connection on the cold side of the intake.
- Fix: Inspect the small vacuum port connections. If the rubber hose is not fully pushed past the “barb” on the intake tube, it will create a vacuum leak. Re-seat the hose and ensure the zip-tie or clamp is secure