
Upgrading your car’s interior completely changes the vibe during night drives. Factory Civic cabins can feel a bit dark and understated once the sun goes down, and adding an ambient lighting kit instantly gives it that sleek, modern luxury feel without breaking the bank.
If you want to skip the hefty professional installation fees, you can easily knock this out in your garage over a weekend. Here is a step-by-step breakdown of how to get it done cleanly and safely.
Tools and Equipment You’ll Need
Getting everything organized beforehand saves you from crawling back and forth to your toolbox mid-project.
- Ambient lighting kit:
Look for a kit that features flexible LED acrylic strips and a central control box. - Plastic trim removal tools:
Essential for popping panels without scratching your dashboard or doors. - Wire strippers, crimpers, and a soldering iron:
Handy if you prefer making secure, permanent hardwire connections. - Add-a-fuse kit & digital multimeter:
Crucial for testing circuits and tapping into power safely. - Electrical tape, heat shrink tubing, and heavy-duty zip ties:
For keeping your wire management clean and out of sight. - Rubbing alcohol and a microfiber towel:
To prep and clean mounting surfaces so the adhesive actually sticks.
Step 0: Always Do a Bench Test First
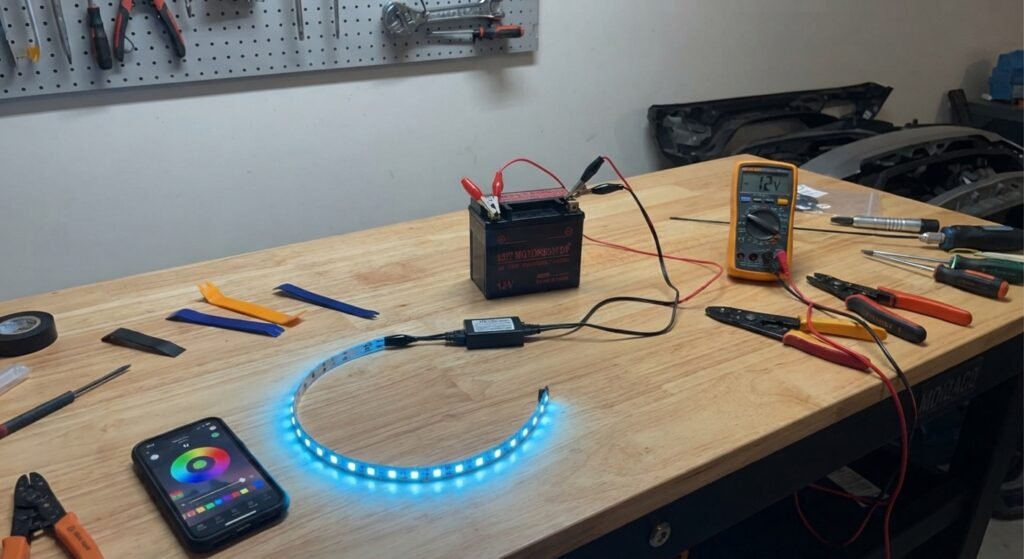
Never skip this step. Before you take apart a single panel in your car, plug your LED strips into the control box and hook them up to a temporary 12V power source on your workbench.
Power it on and make sure every single LED chip, color zone, and remote or app function works. Finding a defective strip on your workbench takes five minutes to fix; finding it after you’ve neatly tucked all your wires behind car panels is a nightmare.
Step 1: Disconnect the Battery & Remove Cabin Trim
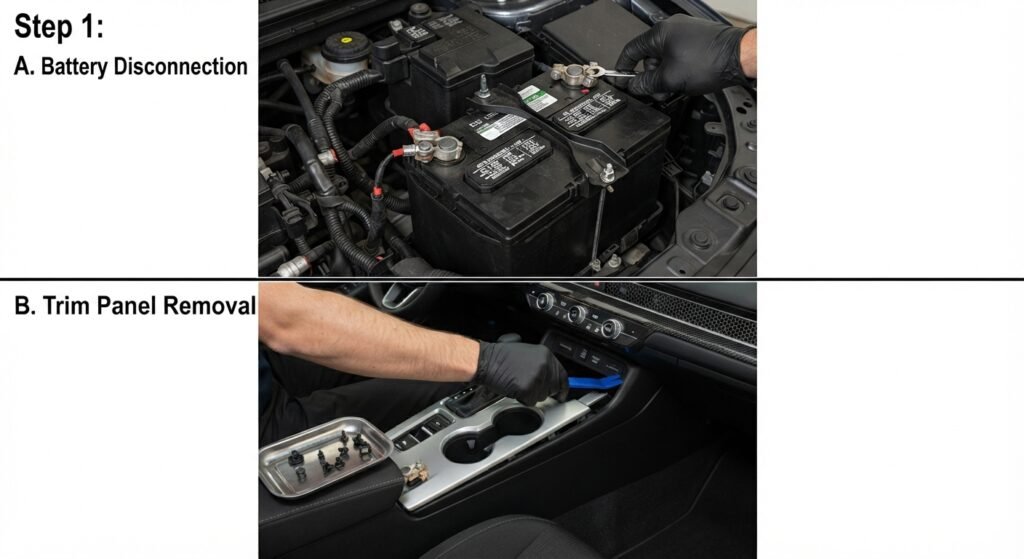
Safety first: disconnect your negative car battery terminal to protect your car’s electronics from accidental short circuits.
Next, grab your plastic trim removal tools and start gently popping out the center console side panels and door inserts. Work slowly and use steady, even pressure especially if your garage is a bit cold, as brittle plastic clips snap easily. Toss all your removed screws and clips into a small magnetic tray or cup so nothing gets lost.
Step 2: Route Your Wires (And Protect the Door Boots)
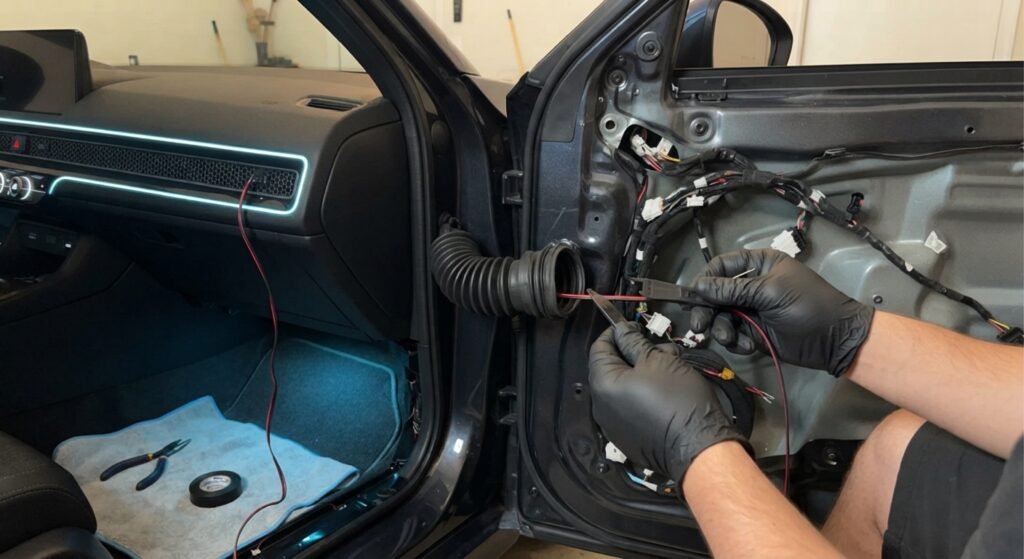
Plan your wire routing before peeling off any adhesive backings. Lay your LED strips along the natural seams and gaps of your dashboard and door panels to see where the excess cable needs to go.
When running power into the doors, feed the wires carefully through the factory rubber door boot connectors. This keeps them completely hidden from view and protects them from getting pinched when the doors open and close. Once everything is routed, bundle up loose wires under the dash with zip ties. Double-check that nothing hangs down near your gas or brake pedals.
Step 3: Tap Into a Safe Power Source
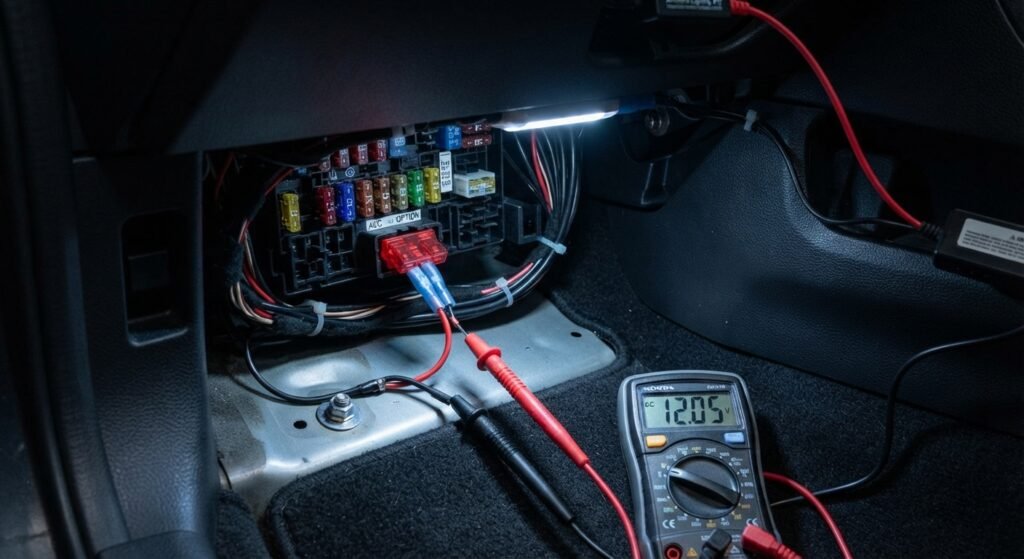
Locate your interior fuse box, which is usually tucked underneath the driver-side dashboard.
- Use your digital multi meter to find a switched 12V power source meaning it only delivers power when your ignition is turned on, so it won’t drain your battery overnight.
- Crimp your positive wire into your add-a-fuse tap and plug it into an open accessory slot (stay far away from critical safety fuses like airbags or fuel pumps).
- Secure your negative ground wire tightly to a clean, bare metal bolt under the dash to complete a stable circuit.
Step 4: Mount the Strips and Put Everything Back Together
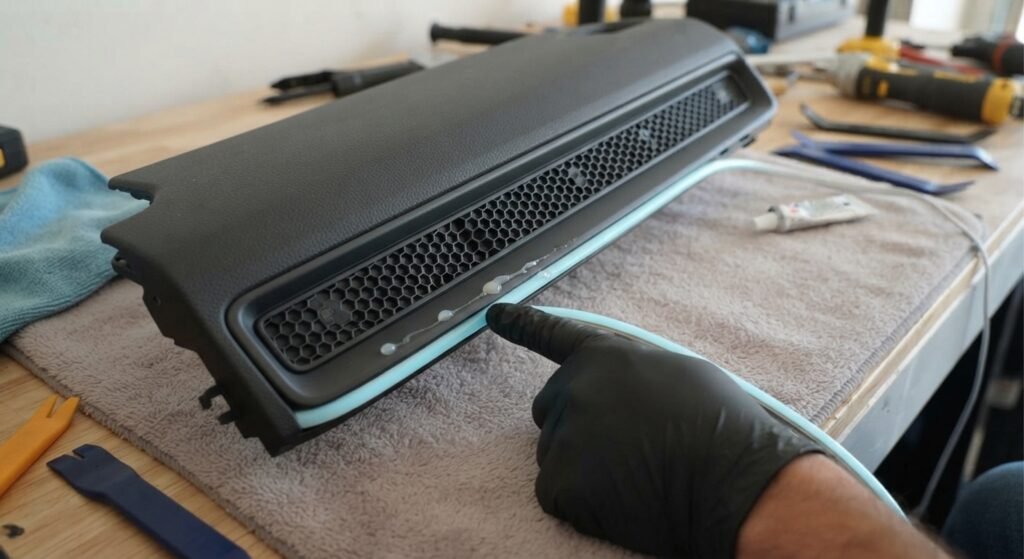
Wipe down all your mounting surfaces thoroughly with rubbing alcohol to remove any lingering Armor All or dashboard protectant, otherwise your adhesive will fail over time.
Press your acrylic light strips firmly into the dashboard and door panel crevices for a flush, OEM-style look. Once everything is secure, carefully snap your interior panels back into place, applying gentle palm pressure over the clips.
Reconnect your battery, turn on the ignition, and do a preliminary test before putting your tools away.
Final Setup & App Pairing
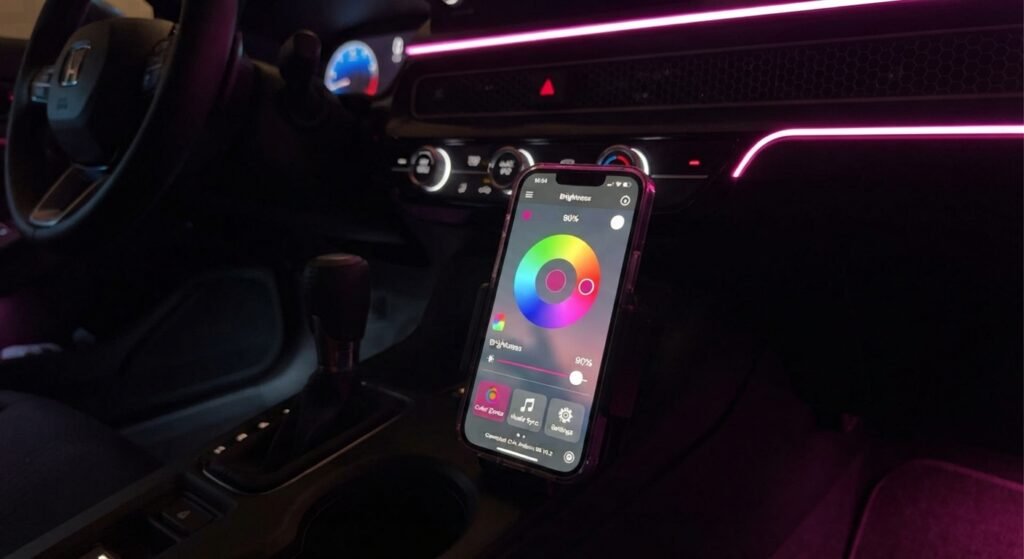
Most modern kits run via Bluetooth. Download the companion app by scanning the QR code in your instruction manual.
Turn on your car ignition, enable Bluetooth on your phone, and pair it with the lighting controller box. Play around with the color wheels, brightness sliders, and music sync modes to make sure every zone responds correctly. If a specific section isn’t lighting up, check your pin connections and polarity at the main control box.