
Introduction
Coolant does more than stop your Honda Civic from overheating. It also protects the water pump, radiator, and engine block from internal rust and corrosion.
Over time, the additives in coolant break down and stop doing their job, even if the fluid still looks fine. That leaves your Civic vulnerable to overheating, heater core clogs, and costly engine damage.
This guide covers exactly when to flush your Civic’s coolant based on model year, plus a full DIY procedure you can do in your own driveway. We’ll also cover the correct fluid, safety steps, and how to properly “burp” the system so no air pockets get left behind.
Honda Civic Coolant Replacement Intervals

Honda changed its coolant chemistry and factory service schedule over the years. That means the right flush interval for your Civic depends heavily on which generation you own.
Older Civics (1992-2005)
Civics from this era use a green, silicate-based coolant formula. It’s effective, but it breaks down faster than the coolant used in newer models.
- Flush every 2 years or 30,000 miles, whichever comes first
- Use only Honda-approved green coolant, pre-mixed 50/50 with distilled water
- Never top off or mix green coolant with newer Honda Type 2 blue coolant
- Inspect hoses and the radiator cap each time you flush, since rubber ages along with the fluid
Modern Civics (2006-Present, Honda Type 2 Blue Coolant)

Starting in 2006, Honda switched to its long-life Type 2 blue coolant. This formula holds up far longer, which pushed factory intervals out considerably.
- First flush is due at 10 years or 105,000 miles, whichever comes first
- After that, flush every 5 years or 60,000 miles
- Always use pre-mixed Honda Type 2 coolant, not a concentrate you dilute yourself
- Check your owner’s manual, since some trims and engines (like the 1.5L turbo) list slightly different intervals
Step-by-Step DIY Coolant Flush Procedure
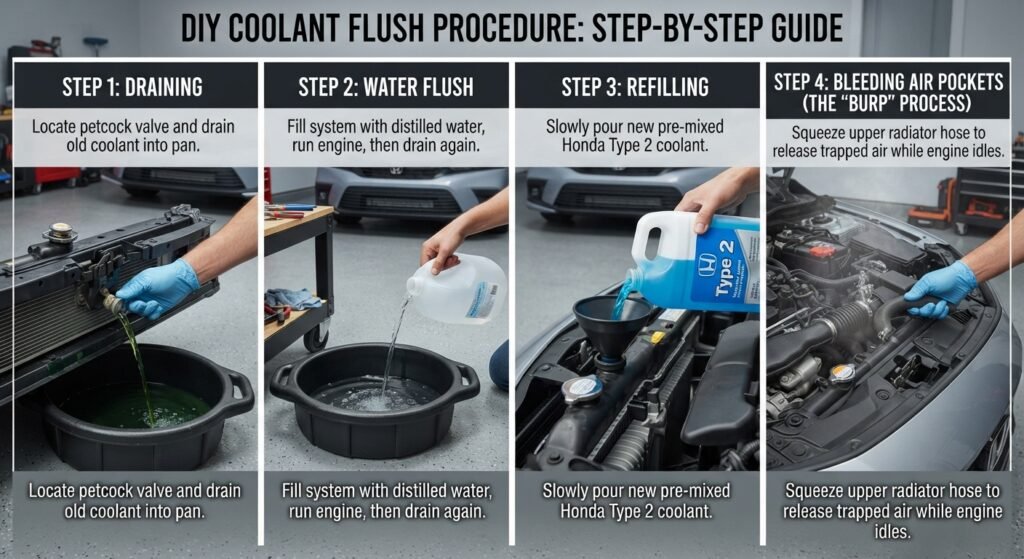
Work only on a fully cooled engine. Let your Civic sit for at least 2 to 3 hours after driving, since a hot cooling system is pressurized and can spray scalding coolant on contact.
Wear safety glasses and chemical-resistant gloves throughout this job. Coolant is toxic if swallowed and can irritate skin on contact, so keep rags handy for spills.
Step 1: Draining
Place a large drain pan under the radiator’s petcock valve, located at the bottom corner of the radiator. Loosen the radiator cap first to help the fluid drain faster and more evenly.
- Open the petcock valve and let the old coolant drain fully into the pan
- If your engine has a block drain plug, remove it too for a more complete drain
- Close the petcock and reinstall any drain plugs once the flow stops
Step 2: Water Flush
With the drains closed, fill the system with distilled water only, then run the engine with the heater on high for about 10 minutes. This circulates water through the entire system, including the heater core, and loosens any leftover debris or rust.
- Shut the engine off and let it cool down again completely
- Drain the water the same way you drained the old coolant
- Repeat this flush once more if the drained water still looks dirty or discolored
Step 3: Refilling
Use only pre-mixed Honda Type 2 coolant for 2006-and-newer Civics, or Honda’s genuine green coolant pre-mixed 50/50 for older models. Pre-mixed fluid removes the guesswork and avoids the mineral buildup that comes from mixing with tap water.
- Pour the coolant in slowly to avoid trapping large air pockets right away
- Fill the radiator neck until fluid reaches the base of the filler neck
- Top off the overflow reservoir to the “Full” or “Max” line, not above it
Step 4: Bleeding Air Pockets (The “Burp” Process)
This is the step most DIYers skip, and it’s the one that causes weak heat and mystery overheating later. Trapped air in the heater core has to be pushed out before the system is truly full.
Leave the radiator cap off, or resting loosely on top, and start the engine with the heater set to full hot and the fan on high. Let the engine idle in this state and watch the coolant level in the radiator neck closely.
As the thermostat opens and the system warms up, you’ll see the level drop as trapped air escapes. This dropping and settling is exactly what “burping” the system means.
- Gently squeeze the upper radiator hose a few times to help push trapped air toward the radiator neck
- Top off the coolant level each time it drops, keeping it near the base of the filler neck
- Continue until the upper radiator hose feels hot and the level stops dropping, which signals the thermostat has fully opened
- Once burping is complete, install the radiator cap firmly and top off the overflow reservoir one last time
Take the Civic for a short drive afterward and watch the temperature gauge. If it climbs abnormally or the heater blows cool air, repeat the burp process, since a pocket may still be trapped.
Eco-Friendly Coolant Disposal in the US

Used coolant is toxic and considered hazardous waste, so it should never go down a drain, storm sewer, or into your yard. Collect every bit of drained fluid in a sealed, clearly labeled container.
- Take used coolant to AutoZone or Advance Auto Parts, both of which accept it for free recycling at most US locations
- Check your city or county’s household hazardous waste facility if auto parts stores nearby don’t accept it
- Some quick-lube shops and municipal recycling centers also take used automotive fluids
- Never reuse a coolant container for anything else, and keep the original label visible until disposal
Ethylene glycol, the main ingredient in most coolants, tastes sweet to pets and wildlife but is highly toxic even in small amounts. Wipe up any spills immediately and keep pets and children out of the garage until the job and cleanup are fully done.
Frequently Asked Questions
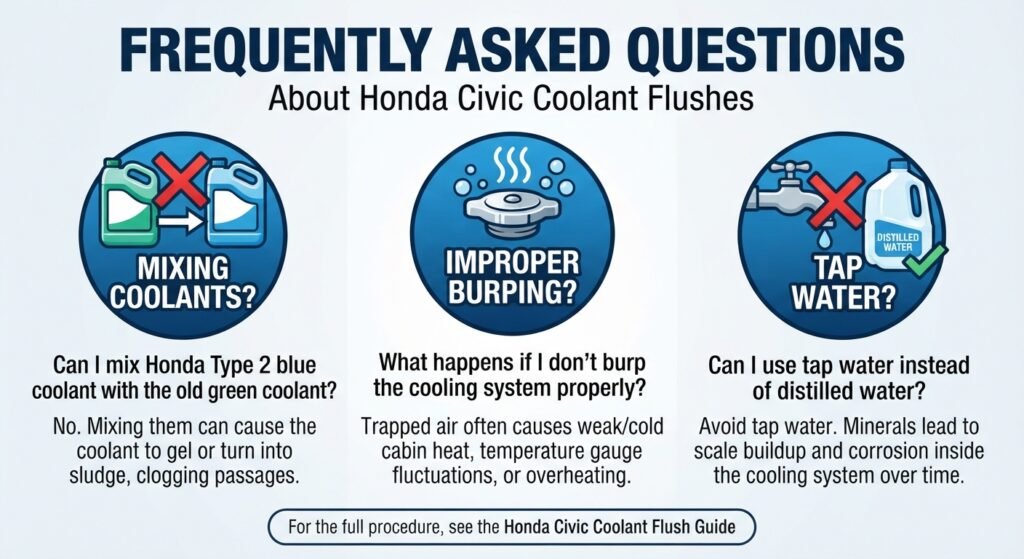
Can I mix Honda Type 2 blue coolant with the old green coolant?
No, you should never mix these two formulas together. Combining them can cause the coolant to gel or turn into a thick sludge, which clogs narrow passages in the radiator and heater core.
What happens if I don’t burp the cooling system properly?
Trapped air in the heater core often shows up as weak or cold cabin heat even after the engine warms up. It can also cause the temperature gauge to fluctuate or spike, since air pockets prevent coolant from flowing evenly.
Can I use tap water instead of distilled water when mixing coolant?
It’s best to avoid tap water, since the minerals in it lead to scale buildup and corrosion inside the cooling system over time. Distilled water is inexpensive and widely available, so there’s little reason to risk it, especially with Honda’s own pre-mixed Type 2 coolant already removing the need to mix anything yourself.