
Introduction
A clean fuel filter helps your Honda Civic run smoothly and use fuel efficiently. Over time, small bits of dirt and rust can build up inside the fuel system. This guide shows you how to deal with that in clear, simple steps.
Most Honda Civic models made after 2001 do not have a separate fuel filter you can easily swap out. Instead, the filter is built into the fuel pump module inside the fuel tank. Older Civics from before that era often have a standalone filter along the fuel line.
Because of this, the exact job you are doing may be either a simple filter swap or a full fuel pump module replacement. This guide covers both situations so you know exactly what to expect for your Civic.
This walkthrough is written for everyday DIY drivers. You do not need to be a professional mechanic to follow along. Just take your time, work carefully, and follow each step in order.
Tools and Materials You Will Need
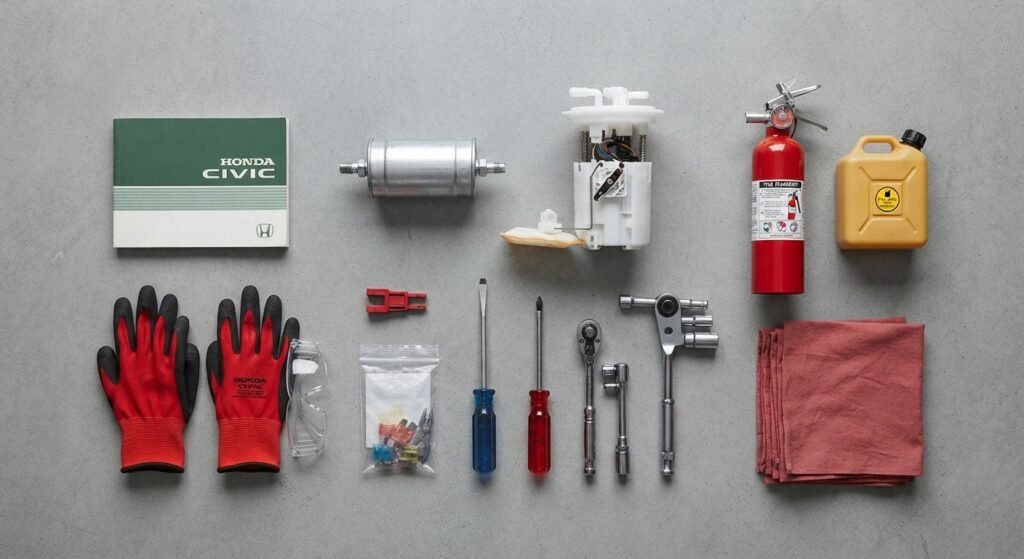
Gather everything below before you start. Having all your tools ready will make the job go much faster.
- Safety glasses and mechanic gloves
- Your Civic’s owner or service manual for your exact model year
- A fuse puller or small pliers
- A flathead screwdriver and a Phillips screwdriver
- A ratchet with a socket set
- A fuel line disconnect tool, needed only on older Civics with an inline filter
- Several clean shop rags or towels
- A small fuel safe container to catch leftover fuel
- A jack and a pair of jack stands, if your Civic needs to be raised
- A new fuel filter, or a new fuel pump module if your Civic uses the in tank design
- A fire extinguisher rated for fuel fires, kept nearby just in case
Always buy the exact part listed for your Civic’s year, engine, and trim. A mismatched part can cause fuel leaks or poor engine performance.
Step by Step Replacement Guide
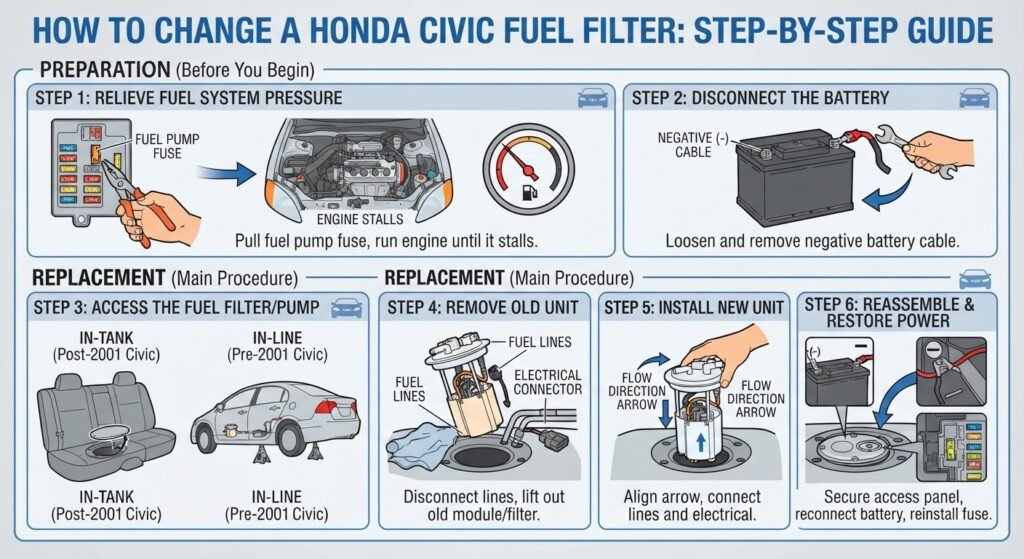
Check Which Type of Fuel Filter Your Civic Has
Before you begin, find out whether your Civic has an inline filter or an in tank filter built into the fuel pump. You can check this in your service manual or by searching your Civic’s exact model year.
Knowing this ahead of time saves you from buying the wrong part. It also tells you whether you will be working under the car or inside the trunk and rear seat area.
Step 1: Relieve the Fuel System Pressure
Fuel systems stay pressurized even when the engine is off. This pressure must be released first, or fuel can spray out when you disconnect a line.
Open your fuse box, which is usually located under the dashboard or in the engine bay. Find the fuel pump fuse using your owner’s manual.
Pull the fuel pump fuse out with a fuse puller or small pliers. Start the engine and let it run until it stalls on its own, then turn the key back to off.
Work in a well ventilated area away from any open flame or spark. Keep your fire extinguisher within reach for the entire job.
Step 2: Disconnect the Battery
Locate the negative battery terminal and loosen the clamp with your wrench or ratchet. Remove the cable and set it aside so it cannot touch the terminal by accident.
This step protects you from electrical shorts while you work near the fuel system. It also resets certain sensors, so expect the engine to relearn its idle after the job is done.
Step 3: Access the Fuel Filter or Fuel Pump Module
On most Civics built after 2001, fold down or lift the rear seat cushion. You should see a small metal access panel on the floor of the trunk area or under the seat.
Remove the screws holding the panel in place with your screwdriver. Set the panel and screws aside somewhere they will not get lost.
On older Civics with an inline filter, the filter is usually mounted along the frame rail near the fuel tank or engine bay. You may need to raise the car safely on jack stands to reach it.
Step 4: Remove the Old Filter or Fuel Pump Module
Place rags around the connection point to catch any fuel that drips out. A small amount of fuel is normal even after relieving pressure.
Carefully disconnect the electrical connector first, then the fuel lines using your fuel line disconnect tool if needed. Note which line was connected to which port before you pull anything free.
Lift the old filter or pump module straight up and out of the tank or bracket. Pour any remaining fuel from the old part into your fuel safe container.
Step 5: Install the New Filter or Fuel Pump Module
Check the new part for an arrow marking that shows the direction fuel should flow through it. Line this arrow up the same way the old part was installed.
Lower the new filter or module into place and reconnect the fuel lines in the same order you removed them. Push each fitting until you hear or feel it click into place.
Reconnect the electrical connector last. Give every connection a gentle tug to confirm it is fully seated.
Step 6: Reassemble and Restore Power
Put the access panel back and reinstall its screws. If you raised the car, lower it carefully back to the ground.
Reconnect the negative battery cable and tighten the clamp. Push the fuel pump fuse back into its slot in the fuse box.
Safety Checks and Verification Steps
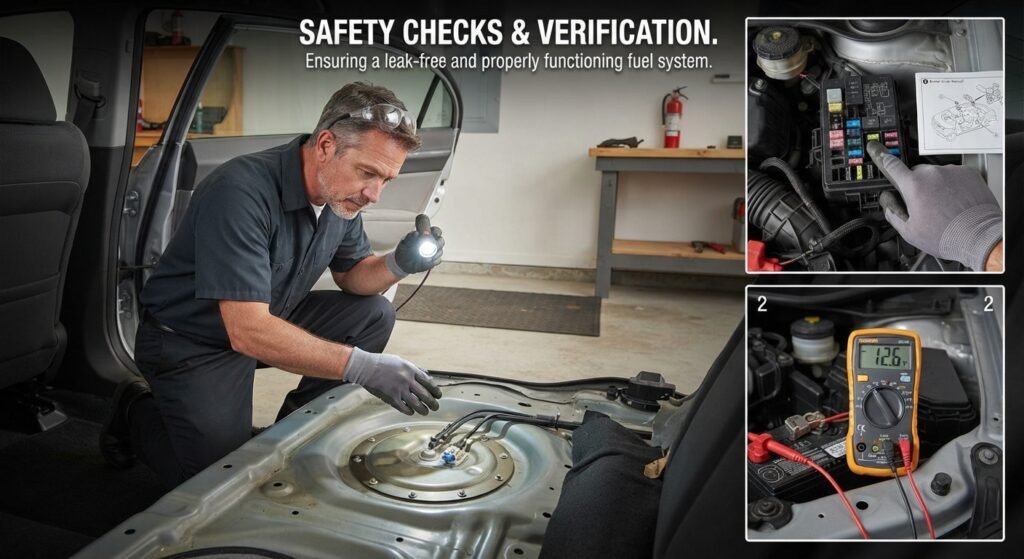
Turn your key to the on position without starting the engine. This lets the fuel pump prime and build pressure in the lines.
Listen for a brief humming sound from the rear of the car. This means the pump is working and pressurizing the new filter or module.
Look closely under the car and around the access panel for any signs of dripping fuel. If you see or smell fuel, turn the engine off right away and check every connection again.
Once everything looks dry, start the engine and let it idle for a few minutes. Watch the idle for any rough running, which can mean a loose connection or an air leak.
Finish with a short test drive at low speed. Pay attention to acceleration and listen for any new noises before driving normally again.
Eco Friendly Disposal Guidelines
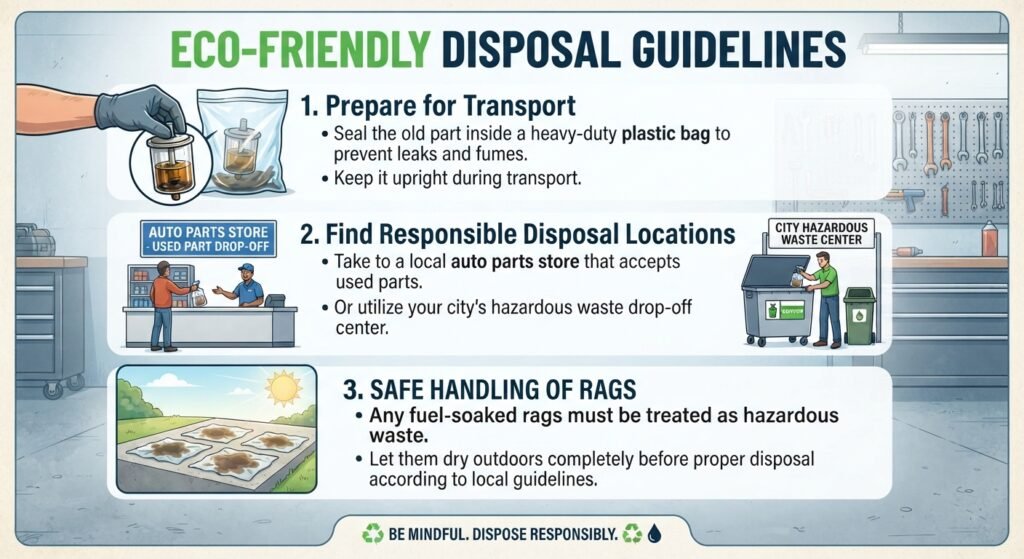
An old fuel filter or fuel pump module still holds a small amount of gasoline inside it. This makes it hazardous waste, so it should never go in your regular household trash.
Seal the old part inside a heavy duty plastic bag to prevent leaks and fumes. Keep it upright during transport so any trapped fuel does not spill.
Take the old part to a local auto parts store, many of which accept used fuel system parts for free. Your city’s hazardous waste drop off center is another good option.
Any rags soaked in fuel should also be treated as hazardous waste. Let them dry outdoors away from heat sources, then dispose of them according to your local waste guidelines.
If your old part has any metal housing, ask the recycling center whether it can be separated and recycled. Being mindful of disposal helps keep fuel and its fumes out of soil, water, and landfills.
Frequently Asked Questions

How often should I change the fuel filter on a Honda Civic?
Civics with an inline filter usually need a change every 30,000 to 50,000 miles, though your owner’s manual has the exact number. Civics with an in tank filter built into the fuel pump are designed to last the life of the pump, so they are not changed on a fixed schedule.
Can I keep driving if my fuel filter is clogged?
It is not a good idea to keep driving with a clogged filter. You may notice rough idling, hesitation, or the engine stalling, and continuing to drive can strain your fuel pump and injectors.
How do I know if my Civic has an inline filter or an in tank filter?
The easiest way is to check your owner’s manual or a parts lookup site using your Civic’s exact model year and VIN. As a general rule, most Civics from 2001 onward use the in tank design, while many earlier models use a separate inline filter.