
Is your Honda Civic refusing to start when you turn the key?
You might hear a frustrating single click or a rapid clicking noise, but the engine simply refuses to turn over.
This is one of the most common electrical issues faced by Honda Civic owners across the United States.
Dealing with a car that won’t start can ruin your entire day, especially if you are stuck in a parking lot or your home driveway.
Fortunately, you do not need an expensive mechanic bill to figure out what is wrong.
This comprehensive diagnostic guide will walk you through finding the exact root cause of your Honda Civic starting problem.
What Does Click No Crank Actually Mean in a Honda Civic?
To fix a problem, you first need to understand how your car’s starting system works.
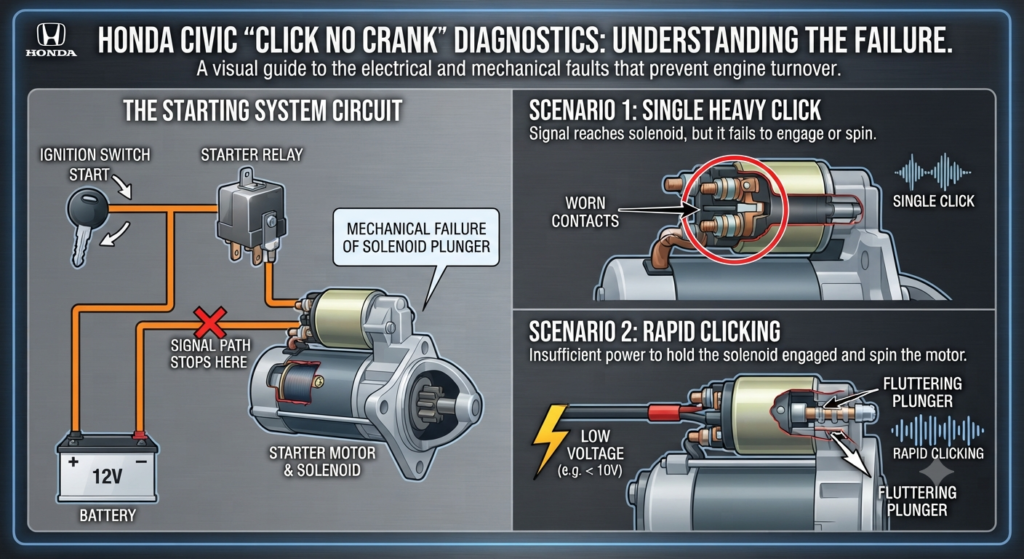
When you turn your ignition key or press the start button, a low voltage electrical signal travels from the ignition switch.
This signal reaches the starter relay, telling it to send heavy battery power directly to the starter motor solenoid.
The solenoid then pushes the starter gear forward to engage the engine flywheel while spinning the motor.
If you hear a rapid clicking sound, it usually means your battery has enough surface charge to activate the relay, but not enough power to spin the heavy starter motor.
If you hear a single, heavy click, the electrical signal is reaching the starter, but the solenoid or the motor itself is failing to rotate.
Step 1: Battery Health and Terminal Inspection
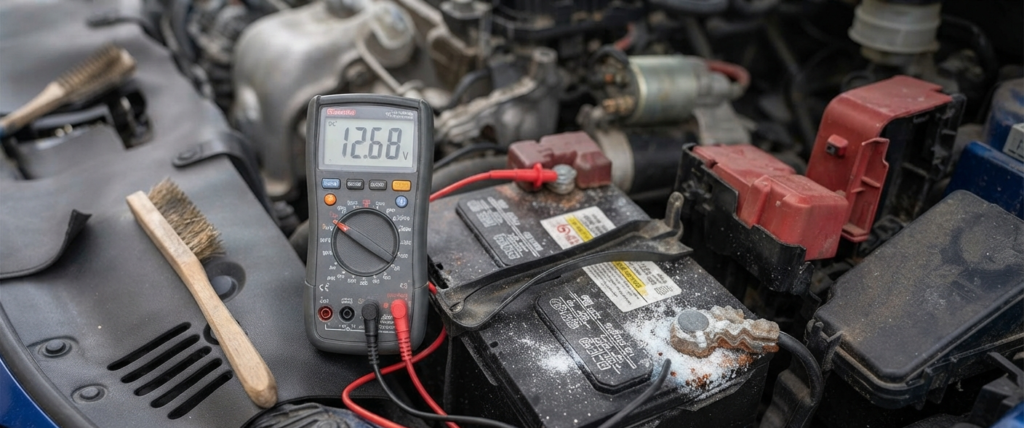
The battery is almost always the primary suspect when dealing with starting issues.
Open the hood of your Honda Civic and inspect the battery terminals closely for any signs of powdery blue or white corrosion.
Corrosion acts as an insulator, blocking the massive amount of electrical current required to spin your starter motor.
Grab a digital multimeter, set it to DC volts, and place the probes on the battery posts.
A healthy, fully charged resting battery should read around 12.6 volts or slightly higher.
If your multimeter reads below 12.0 volts, your battery is either discharged or nearing the end of its lifespan.
Do not forget to check the main ground wire connecting the negative battery terminal to the transmission housing.
If this ground cable is loose, rusted, or frayed, the starting current cannot complete its electrical circuit.
Step 2: Testing the Starter Relay and Fuses
If your battery passes the voltage test and your terminals are clean, the next step is checking the power delivery components.
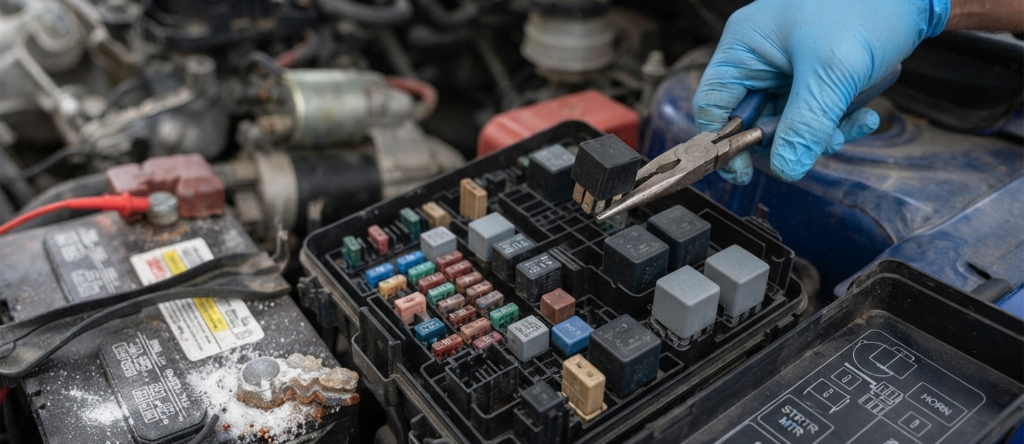
Locate the under-hood fuse box in your Honda Civic, which is usually situated near the air filter box.
Open the fuse box cover and look at the diagram to find the main starter fuse and the starter relay.
Pull out the starter relay and inspect its metal prongs for any signs of melting, burning, or carbon buildup.
A quick field trick to test the relay is swapping it with an identical accessory relay inside the same box, such as your horn relay.
If your horn works after the swap, try starting your car using that swapped relay.
If the car suddenly cranks, your original starter relay was faulty and needs to be replaced.
Step 3: Performing a Voltage Drop Test on the Starter Cable
Many vehicle owners make the mistake of assuming a battery is good just because it shows 12 volts on a multimeter.
Surface voltage checks can often lie because they do not measure how the circuit behaves under a heavy electrical load.
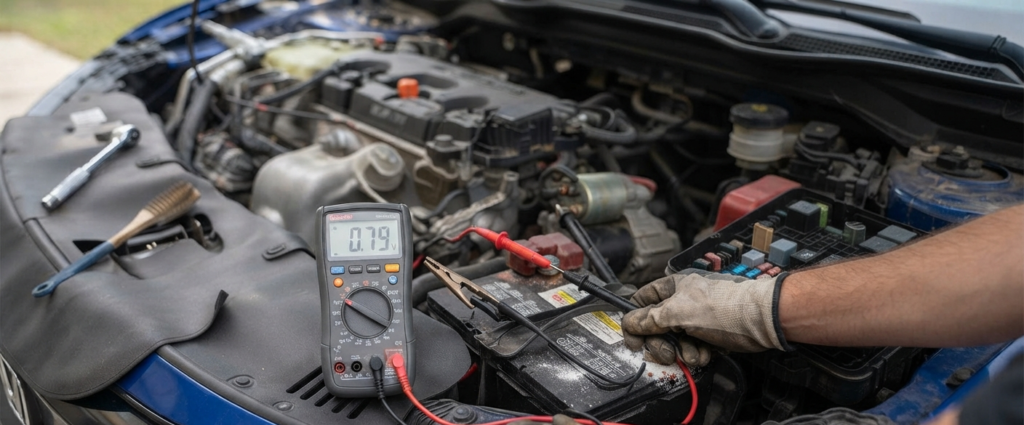
To find hidden wiring faults, you need to perform a voltage drop test on the positive battery cable leading to the starter.
Connect your multimeter leads across the positive battery terminal and the main power stud on the starter solenoid.
Have a friend attempt to crank the engine while you watch the multimeter display.
If your multimeter shows a reading higher than 0.5 volts during cranking, it means there is excessive resistance in the cable.
This high resistance prevents the starter motor from getting the full amperage it needs to operate.
Step 4: Inspecting the Starter Motor and Solenoid
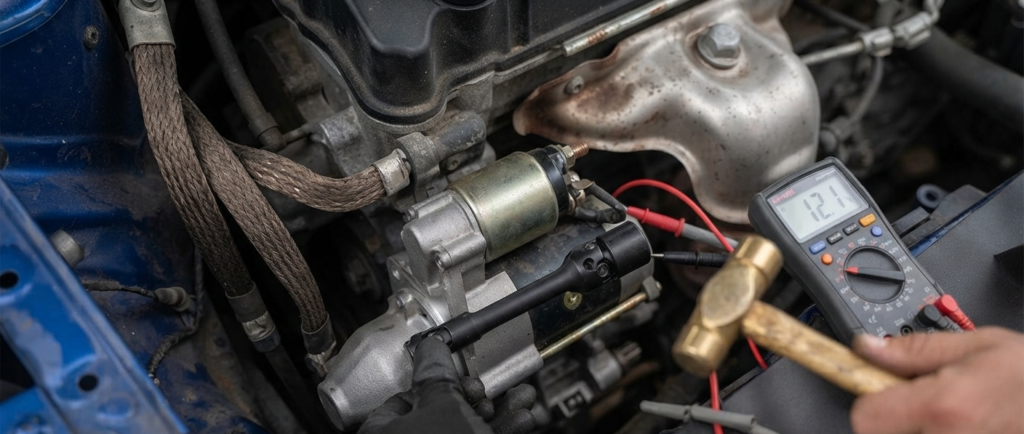
The Honda Civic engine bay is notoriously tight, especially on newer generations, leaving very little working room around the exhaust manifold.
The starter motor is typically mounted low down near the back of the engine block where it meets the transmission.
Because of this cramped layout, you may need a long socket extension and a universal joint adapter to reach the mounting bolts.
One classic diagnostic trick for a stuck starter solenoid is the percussion test.
Take a long metal extension rod or a hammer and gently tap the body of the starter motor while an assistant turns the key.
If tapping the starter temporarily frees up worn internal carbon brushes and allows the car to start, your starter motor is failing.
You should also use your multimeter to check for a steady 12-volt signal at the smaller starter control wire when the key is turned.
If the signal is present and the battery cables are healthy, but the motor remains dead, the starter assembly must be replaced.
Transmission Safety Switch Check: Automatic vs Manual
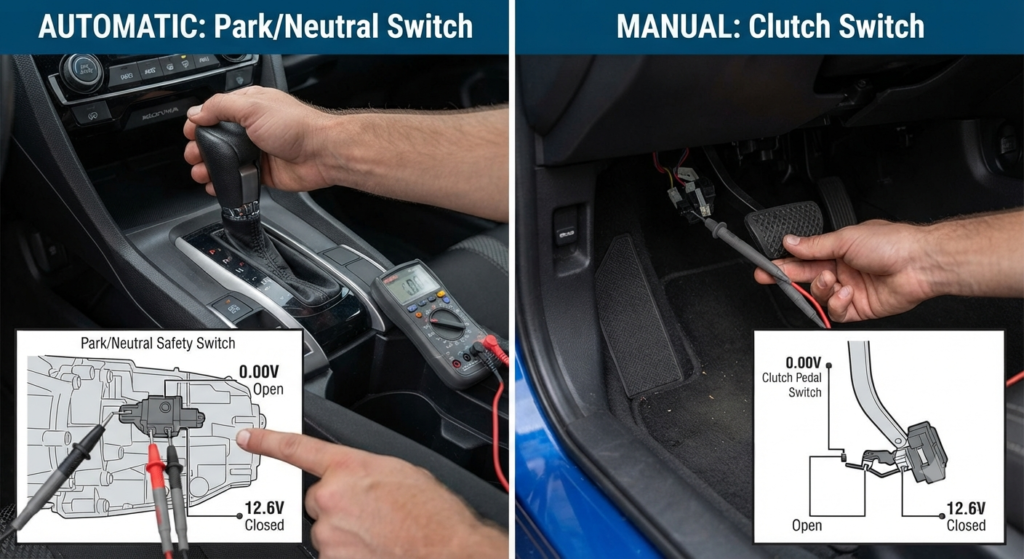
Sometimes the starter motor is completely fine, but an electronic safety sensor is blocking the signal entirely.
If you drive an automatic Honda Civic, the car will only permit the starter to engage when the gear selector is firmly in Park or Neutral.
A misaligned or worn-out transmission range switch can trick the computer into thinking the car is still in Drive.
Try shifting the gear lever back and forth between Park and Neutral while holding the key in the start position.
If your Civic suddenly cranks while wiggling the shifter, your transmission safety switch is failing adjustment.
For manual transmission Civic models, a similar safety rule applies to the clutch pedal switch.
If the plastic stopper on the clutch pedal arm breaks away, the starter switch will never close when you press the pedal to the floor.
Conclusion and Repair Cost Breakdown
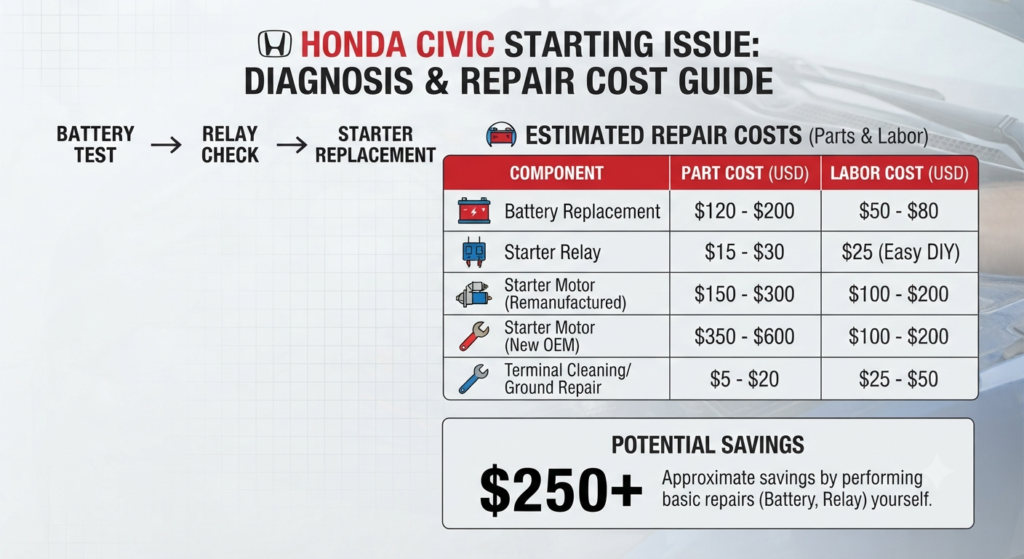
Diagnosing a click-no-crank issue on a Honda Civic comes down to methodically following the power path from the battery to the starter.
Start with the easiest and cheapest items first, such as cleaning battery terminals and swapping standard relays.
Move down the line to testing the battery voltage under load, checking ground wires, and inspecting the starter motor itself.
If you catch a bad battery early, replacement costs are relatively low and can be handled at home in minutes.
If your starter motor has internal mechanical failure, replacing it requires some patience due to tight engine bay clearance.
Doing this job yourself saves hundreds of dollars in mechanic labor costs and gets your reliable Honda Civic back on the road quickly.