
Turning the key in your Honda Civic and hearing nothing except a single loud click is a deeply frustrating experience. If your engine refuses to crank, a failing starter motor is very often the root cause of the problem.
High-mileage Honda Civics are well known for starter motor failures due to constant heat soak from the exhaust manifold and heavy stop-and-go city driving. When this failure happens, you are forced to make a major financial decision. You can pay a professional auto mechanic to handle the job, or you can grab your tools and tackle the replacement yourself in your driveway.
This comprehensive guide breaks down the exact costs, time investments, hidden expenses, and step-by-step procedures for both options. It helps you decide whether keeping your money in your pocket is truly worth the physical effort.
Detailed Signs Your Honda Civic Starter Motor Is Failing

Before you spend money on parts or schedule an expensive tow truck, you must confirm that the starter is actually broken. Many vehicle owners mistakenly replace a good starter when the real issue is just a weak battery.
Here are the most reliable indicators that your Honda Civic starter motor is dying:
- The Single Loud Click: You turn the key or push the start button, and you hear a single distinct click coming from the engine compartment, but the engine fails to turn over.
- Rapid Machine Gun Clicking: A rapid series of clicks usually points to a discharged car battery, loose battery terminals, or a failing alternator rather than a bad starter motor.
- Intermittent Starting Failures: Your Civic starts up normally in the morning, but after you drive to a local store and turn the engine off, it refuses to start again until the engine cools down completely.
- Whirring Without Cranking: If you turn the key and hear a high-pitched whirring sound like an electric drill, the starter motor is spinning, but the starter drive gear is failing to engage the engine flywheel.
Pro Tip: Always test your battery voltage and inspect your battery ground cables for corrosion before assuming you need to buy a brand new starter.
Professional Mechanic Replacement Price Breakdown
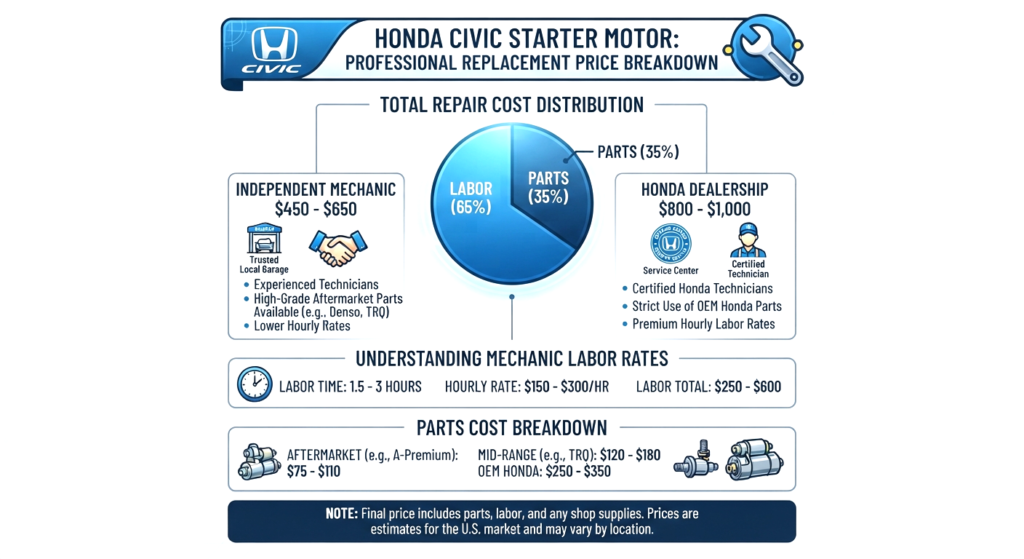
Taking your Honda Civic to a professional repair shop is certainly the most convenient route, but it requires a significant financial investment.
In the United States, a professional starter motor replacement typically ranges between $450 and $900 for total parts and labor.
Understanding Mechanic Labor Rates
Professional mechanic shops and service centers charge standard hourly labor rates ranging from $150 to $300 per hour. Replacing a starter on a Honda Civic generally takes between 1.5 and 3 hours of dedicated technician time. Because of tight engine layouts, labor alone usually accounts for $250 to $600 of your total repair bill.
Dealership Pricing Versus Independent Mechanics
If you take your Civic to an official Honda dealership, expect your final bill to sit on the higher end of the spectrum, often pushing close to $800 to $1,000. Dealerships rely strictly on genuine OEM Honda parts and charge premium hourly labor rates.
Taking your car to a trusted local independent mechanic can drop your total bill closer to the $450 to $650 range, especially if you authorize them to use high-grade aftermarket replacement parts.
DIY Replacement Cost Breakdown and Tool Requirements
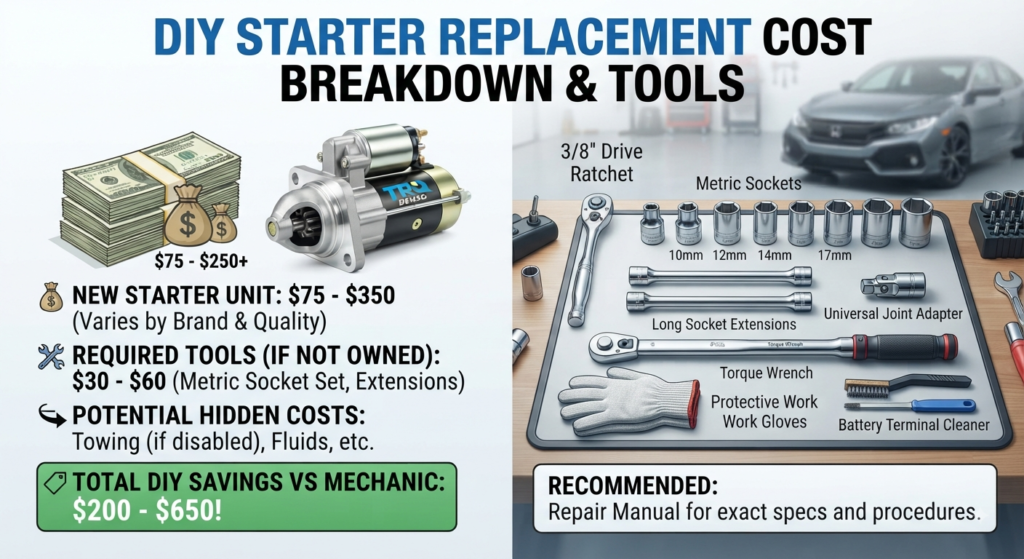
Fixing the vehicle yourself is the single best way to avoid high labor charges and keep your hard-earned money in your bank account. Purchasing the replacement parts yourself usually costs between $75 and $250.
Exploring Your Part Options
- Budget Aftermarket Parts: Economy brands like A-Premium cost around $75 to $110. They are affordable, but long-term reliability can sometimes be unpredictable.
- Mid-Range Aftermarket Parts: Reliable brands like TRQ or Denso cost around $120 to $180. These offer excellent durability and frequently match factory specifications.
- OEM Honda Genuine Parts: Buying a factory starter directly from a dealership parts counter costs $250 to $350.
Hidden DIY Expenses to Anticipate
Do not forget to calculate your current tool inventory into the budget. If you do not already own a metric socket set, long socket extensions, and a universal joint adapter, you may need to spend an extra $30 to $50 on tools to reach the deeply buried bolts in a Civic engine bay.
Additionally, if your car is completely dead in your garage and your DIY attempt goes wrong halfway through, a tow truck ride to a local shop can cost an unexpected $100 to $200.
Head-to-Head Comparison Table
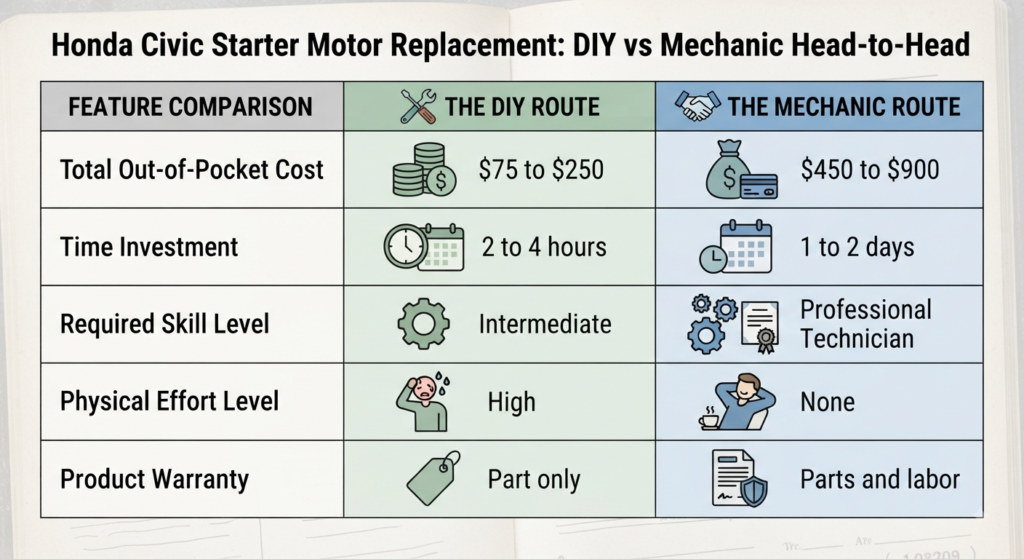
| Feature Comparison | The DIY Route | The Mechanic Route |
| Total Out-of-Pocket Cost | $75 to $250 | $450 to $900 |
| Time Investment | 2 to 4 hours of your day | 1 to 2 days shop turnaround |
| Required Skill Level | Intermediate mechanical ability | Professional technician |
| Physical Effort Level | High (tight spaces, heavy lifting) | None (drop off and pick up) |
| Product Warranty | Part warranty only (1 year or lifetime) | Parts and labor warranty (usually 12 months) |
Comprehensive Step-by-Step DIY Overview for Honda Civics
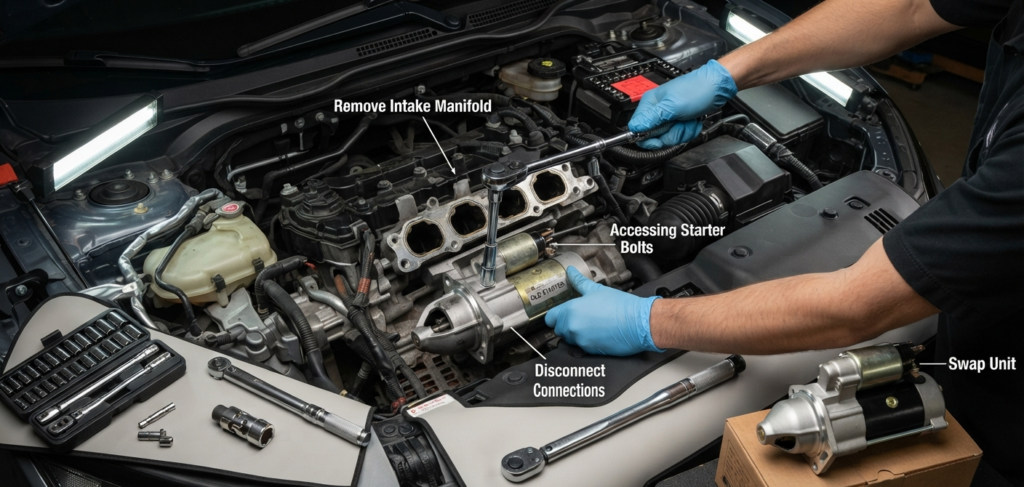
If you decide to save hundreds of dollars and conquer this project in your driveway, follow this high-level technical roadmap.
Step 1: Disconnect the Battery Safely
Always disconnect the negative battery terminal first before touching any wiring. This prevents accidental electrical shorts, blown fuses, or dangerous sparks while working near live alternator cables.
Step 2: Gain Access to the Starter
Depending on your specific Civic model year, the starter motor sits underneath the intake manifold or near the firewall. Many experienced DIYers find it much easier to remove the passenger side front tire and inner splash guard, allowing them to use a long socket extension to reach the hidden mounting bolts.
Step 3: Disconnect Electrical Connections
Carefully unbolt the main battery power cable nut and unplug the small plastic trigger wire connector attached to the back of the starter solenoid. Do not yank the wires.
Step 4: Remove and Swap the Unit
Unbolt the primary mounting bolts holding the starter housing securely to the engine block. Pull the old unit out of the cavity, slide the new starter into exact alignment, and hand-thread the mounting bolts before tightening them down.
Step 5: Reassemble and Test
Reconnect your wiring harness securely, put your front tire back on if you removed it, reconnect the negative battery terminal, and turn your key to test your brand new starter.
The Final Verdict: Should You DIY or Hire a Mechanic?
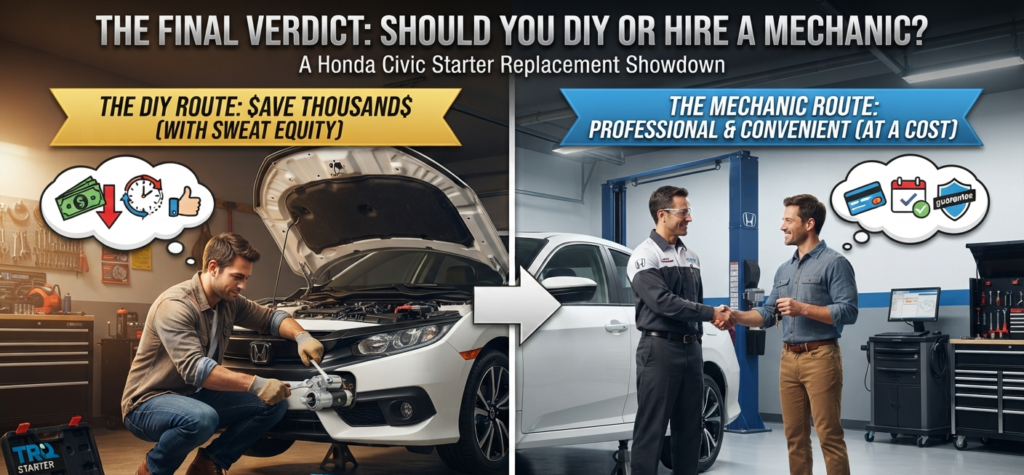
- Choose the DIY route:
if you possess intermediate mechanical skills, own basic metric garage tools, have a free Saturday afternoon available, and feel strongly motivated to keep $500 in your pocket. - Choose a professional mechanic:
if your car broke down unexpectedly miles away from home, you lack safe covered parking or proper tools, or you simply do not want to spend hours fighting stubborn bolts in a cramped engine bay.